
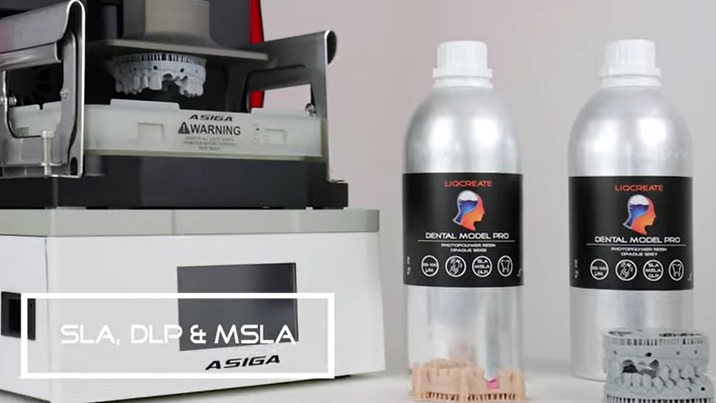
Asiga brand positioning in dental 3D printing
Asiga positions itself as a high‑precision dental 3D‑printing manufacturer focused on accuracy, repeatability and industrial‑grade optical performance. The brand is known for its engineered light engines, stable mechanics and controlled exposure delivery, making Asiga systems suitable for restorative, orthodontic and appliance workflows that require consistent dimensional behavior. Asiga’s workflow philosophy emphasizes reliability, calibration stability and predictable resin performance across daily production environments.
Asiga printer lines and Liqcreate compatibility
Asiga offers three primary printer lines: the MAX series for compact, high‑accuracy dental production; the PRO series for laboratory‑grade throughput; and the ULTRA series for advanced optical performance in demanding clinical workflows. MAX and PRO printers operate reliably with Liqcreate Premium Model, Dental Model Pro and other validated dental resins when exposure parameters are correctly aligned. The ULTRA series extends this compatibility with higher optical stability and improved detail reproduction, supporting consistent performance with Liqcreate dental model resins in precision‑focused dental applications.
Asiga dental 3D-printer ecosystem overview
Asiga dental 3D printers use high-precision DLP light engines with controlled optical output and fine pixel pitch, enabling consistent curing behavior across dental model, splint, surgical guide and indirect restoration applications. Their mechanical platform design, including rigid Z-axis assemblies and stable build platforms, supports dimensional repeatability and accuracy-driven workflows.
The combination of optical uniformity and mechanical stability makes Asiga systems suitable for applications where marginal fit, occlusal contact and interproximal accuracy are critical, provided that resin selection, exposure settings and calibration are aligned with the intended indication.
Light engine behavior and optical characteristics
Asiga DLP light engines typically provide uniform irradiance across the build area, which reduces regional overcure or undercure tendencies when exposure settings are correctly matched to the resin. Pixel size and projected image sharpness influence edge definition, surface detail and the reproduction of fine anatomical structures on dental models and appliances.
Consistent optical output over time is important for maintaining stable exposure behavior. Changes in LED intensity, optics contamination or projector alignment can affect cure depth and dimensional accuracy, and should be monitored as part of routine maintenance and calibration.
Mechanical stability and build platform behavior
Asiga printers are designed with rigid Z-axis components and controlled layer movement to minimize vibration and deflection during printing. This mechanical stability supports predictable layer stacking and reduces the risk of banding, layer shifts or cumulative Z-error in tall dental models and multi-unit builds.
Build platform flatness and secure clamping are critical for first-layer adhesion and consistent layer thickness. Any deviation in platform alignment or mechanical play can translate into dimensional variation, especially in indication types where vertical accuracy and occlusal relationships are important.
Resin interaction and material behavior
Liqcreate dental resins on Asiga systems show material-specific behavior related to viscosity, reactivity, shrinkage and green strength. Higher reactivity resins may require reduced exposure times to avoid overcure and loss of fine detail, while lower reactivity materials may need longer exposure or adjusted layer strategies to ensure complete polymerization.
Shrinkage behavior during curing and post-curing can influence marginal fit, contact points and model dimensions. Matching resin selection to the clinical indication and following validated exposure and post-curing protocols is essential for maintaining accuracy and surface quality.
Exposure strategy for Asiga dental workflows
Exposure strategies on Asiga printers typically differentiate between base layers and normal layers. Base layers often use higher exposure to ensure strong adhesion to the build platform, while normal layers use optimized exposure to balance cure depth, surface quality and dimensional stability.
Lift speeds, retract distances and rest times between layers influence peel forces and resin flow. For high-detail dental models and thin structures, controlled movement and adequate resin replenishment time help prevent layer separation, distortion or surface artifacts.
Accuracy behavior and influencing factors
Accuracy on Asiga dental printers is influenced by optical resolution, mechanical stability, resin properties, exposure settings, support strategy and post-processing. XY accuracy is primarily driven by pixel size and optical sharpness, while Z accuracy depends on layer thickness control, Z-axis mechanics and cumulative layer behavior.
Resin-specific factors such as shrinkage, green strength and post-cure expansion can affect final dimensions. Following validated settings from the Dental resin instructions overview and using indication-appropriate support strategies helps maintain consistent accuracy across different dental applications.
Calibration routines for stable performance
Regular calibration of Asiga printers supports stable accuracy and repeatable exposure behavior. This includes build platform leveling, verification of layer thickness, inspection of light engine output and, where applicable, projector alignment checks.
Calibration should be combined with periodic test prints and dimensional checks on reference geometries or standardized dental models. Deviations from expected dimensions can indicate the need for mechanical inspection, optical cleaning or adjustment of exposure parameters.
Common issues and troubleshooting patterns
Typical issues on Asiga dental workflows include undercure, overcure, surface roughness, layer lines, incomplete features and dimensional drift. Undercure may present as soft surfaces, poor detail or delamination, while overcure can cause loss of fine anatomy, rounded edges or dimensional oversizing.
Surface artifacts can result from contamination on the build platform, resin vat or optics, as well as from incorrect support placement or excessive peel forces. Systematic troubleshooting combines inspection of mechanical components, verification of resin condition, review of exposure settings and comparison with validated parameters.
Workflow integration for dental 3D‑printing
Asiga dental workflows should be configured in combination with the Liqcreate Dental resin instructions page, the Dental 3D-printers overview, the printer accuracy and calibration article and the printer troubleshooting overview to maintain consistency across indications and printer ecosystems.
By aligning Asiga printer behavior with validated Liqcreate resin settings, structured calibration routines and documented troubleshooting patterns, labs can build stable, predictable workflows for dental models, splints, surgical guides and other dental applications within the Dental 3D-printing field.
Related resources for dental 3D‑printers
- Dental 3D-printers page – main page connecting all dental 3D-printer brands, model pages, accuracy resources and troubleshooting guides.
- Dental resin instructions overview – validated exposure settings, handling notes and material behavior for Liqcreate dental resins.
- Printer accuracy and calibration – guidance on accuracy measurement, calibration routines and influencing factors for dental 3D printers.
- Dental 3D-printer troubleshooting page – structured troubleshooting for exposure issues, surface defects and stability problems across supported printer ecosystems.
Support
Do you need any help with 3D printing our SLA, DLP or LCD resins? We can help you! Just look for the question you have below. If you can’t find it, let us know by contacting us!
